Showing posts with label Breads. Show all posts

Thursday, December 9, 2021

Elves Bread - lembas or waybread: Made from all good things

Yes!
This tastes better than it looks and it looks darn good! It is insanely delicious and addictive. 

This 'bread' kept me alive during the long excruciating months of chemotherapy. 

I ate two slices of this for the whole day. Packed with vital nutrition.  

AND my bowel movements stayed regular during all my treatments which is unheard of. 

My whole family eats this now and a friend who baked this for me during chemotherapy now bakes this regularly for her family too!

Hence the name Elves bread "Lembas"


Recipe
Recipe can be used for both bread and crackers

Ingredients:

0.5 cup  Flax seeds ( best freshly grind as it looses nutritional value fast)
4 tablespoons psyllium
2 tablespoons chia seeds  (whole)
1.5 cups of oats (rolled whole, or ground- Whatever is on sale)

1 cup whole nuts (ie walnuts/almonds/hazelnuts or a combination of your choice)
1 cup of mixed sunflower seeds and pumpkin seeds 
4 tablespoons ground coconut (optional)
1.5 glasses of water. Yes, 1.5!
3 tablespoons olive oil or coconut oil.
1 teaspoon salt.
0.5 cup Cranberries or Raisins (optional)


Instructions:
  • Mix all dry ingredients together.
  • Add wet ingredients and mix well.


TIP:  Recycle a clean nylon shopping bag by mixing all dry ingredients inside! Then add the wet ingredients and massage the bag from the outside "kneading' thoroughly the dough

Keeps hands clean with zero dishwashing!


  • Transfer the dough to a lined loaf pan. The dough will quickly start to harden.

  • Leave at room temperature overnight or long enough to allow the batter to solidify (minimum 2 hours)

  • Preheat the oven to 180 degrees and bake for 30 minutes, or till firm on top and the loaf stays in shape when turned out of tin. If it still slouches bake further till firm to stand alone. 
  • Remove the bread from the pan, and continue to bake upside down for a further 20 mins, to 'crisp' the sides. Do not brown too much, should be soft to the touch.
  • Remove from the oven.

  • Leave to cool. Semi freeze or refrigerate overnight. Before slicing.
Tip: This bread cuts much easier when cold. Best enjoyed cut to thin slice

Note:
This bread freezes really well!
For best results, slice thinly BEFORE placing in the freezer. 
Great for family, anyone on a budget. It is very economical, my family takes out the exact number of slices when needed.

TIP: Use a long cheese knife (one with holes inside -  see pic below)
It really helps to cut super thin slices.


To maximize oven space I make two loaves at a time, one sweet with cranberries and another savoury with onions and sage/rosemary.

Always a winner at gatherings or the perfect food gift.


Note:

I always bake two loaves. I sliced them up and put them straight in the freezer. 
Pulling out the EXACT amount of slices on demand. So nothing goes to waste.

They are also the best food gifts.

This 'dough' can also be rolled out and flattened to make awesome crackers!

It is very impressive looking and goes great with any homemade cheese (see easy cheese recipe)
I love it with cashew or almond cheese looks great and tastes divine!

This bread will regulate your bowels, even if you were not having problems, it does wonders. It kept me regular all through my chemotherapy and I have no doubt did other wonders to my body as it fought against Cancer as well as healing after and from the chemotherapy effects.

Drink plenty of water psyllium, flax and chia as big liquid absorbers.


Thursday, April 1, 2021

Sunday, February 10, 2019

Gluten free bread - Revisted

 Gluten-free bread, that NO ONE will notice it's GF

Ok, tips and tricks from ingredients to accelerating the rising to get these babies faster in our mouths!

This recipe I made my own.  After making it so many time and tweaking to perfection, it comes out EVERYTIME.  Love the smell of fresh bread in the house again!


I always have a big bag of GF flour mix all ready to go. Call me old fashion, I like to mix my own bag of GF flour

Flour mix:

3 cups oat meal (ground regular rolled oats)
3 cups White Rice flour
3 cups Topica flour
3 cups glutinous rice flour 
3 Tbps of Xanthan gum

Note: I've used 6 cups of rice flour only, or 6 cups of glutinous rice flour only, whatever I had (when I don't have a mixture)


Bread Recipe

2  1/2 cup of GF flour
1  1/4 cup  soy milk

25 gr (1 cube)  (I prefer to use fresh cubes and test it's still active)
2 tbps sugar to yeast for fermenting
2 tbps of olive oil
2  Eggs
1 tsp Vinegar
1  1/2 tsp Xanthan Gum
1 cup Flax
1 tsp Salt
Walnuts/Craberries optional

Pre-heat oven 250c

Dry Flour Mix:
Add freshly ground Flax, Xanthan gum , GF flour, Salt

Yeast Mix:2 tbps of water.
Add Yeast.
Add 2 tbps of sugar
Stir well. Leave to ferment.
Tip: place in boiling water bain marie to speed up fermentation

Dry ingredients:

GF Flour
Add freshly ground flax seeds, Xanthan Gum, salt,
Mix slightly.
Add Eggs,
Add Vinegar,
Add Olive oil
Soy milk
Mix knead well with hooks.
GF bread is stickier than regular bread and can only be kneaded with hooks.

Then add walnuts/cranberries/ your choice: ie. dried Tomatoes, Olives etc.,  at this stage.
Incorporate well into the dough.


TIP:
I place the loaves to rise in a bain maire filled with boiling water.
Takes about an hour to rise to a glorious crown height.


The oven should be hot now.
Line loaf tin.  I always make two at a time.
Place bread on the middle shelf.
Continue baking at same temperature.   Check after 10 mins if the top has brown enough.
Cover with aluminium foil to protect and continue baking till done.  (Done = tap on bread all sides for hollow sound)


*Note Yeast:  use a big enough bowl to allow yeast to grow and not overspill.
Watch carefully for it to ferment.  It could foam very fast.
(Trick: Bain Maire it in boiling water from the kettle to accelerate the fermenting)
Once proofed the yeast is working quickly

Tip:
To speed up the rising I rest the bread tin in a tray of boiling water.
This really hastens the rising time dramatically, especially in the winter.

This GF bread comes out every time and I've made it SOOO many times.  It comes out moist and best cut thinly when cold.
Dust with "flour" for a professional amazing look!

 They always rise like crazy.  Here dusted with quinoa and oats


 Spread with mayo, avocado and cured fish


 So nice to have the smell of fresh bread in the house again. Gluten Free! WoooHooo!

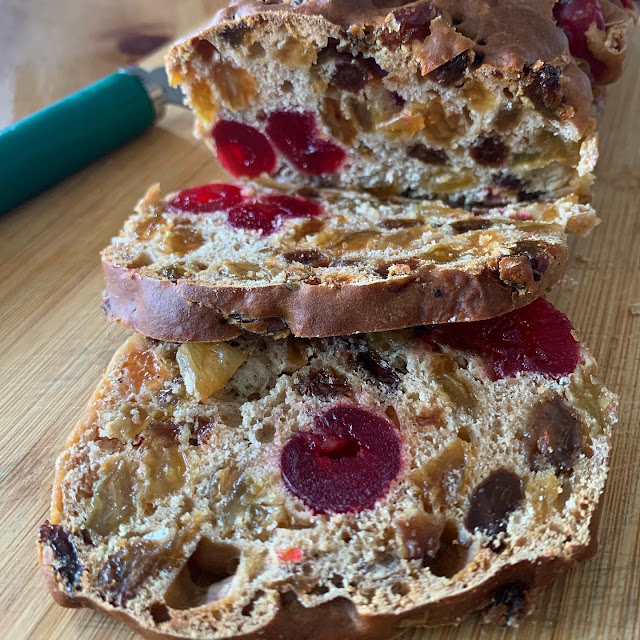
 Laced with cranberries

Zarter GF Bread
 My classic walnut, never tire from this

Nor Cranberries


Friday, November 24, 2017

Gluten free Bread

Noreen's Recipe (Recipe No. 1)


Noreen's Recipe (recommend)

Flour mix:

3 cups if Sorghum flour (I've used  oat flour (blended oats) instead of Sorghum - worked fine)
3 cups White Rice flour
3 cups Topica flour
3 cups glutinous rice flour (original recipe with sweet rice)
3 Tbps of Xanthan gum

I always have a big bag prepared all ready to go.


Bread Recipe
1  1/4 cup warm milk/ soy milk
1/4  cup ( 4 Tbps)  cup sugar
25 gr (1 cube)  2 1/4 yeast - (best use very fresh vacuum or fresh yeast - test still active)
50 gr (1/4) melted butter
2  Eggs
1 tsp Vinegar
2  1/2 cup of GF flour
1  1/2 tsp Xanthan Gum
1/2 cup Flax
1 tsp Salt
Walnuts optional

Pre-heat oven 250c

Dry Flour Mix:
Add freshly ground Flax, Xanthan gum , GF flour, Salt

Yeast Mix:
Microwave milk, butter until melted.  Stir.
Add Sugar. Dissolve.
Add Yeast.  Stir well. Leave to ferment. (see note below)

Add  liquid to Flour mix.
Mix slightly.
Add Eggs, mix.
Add Vinegar,
Add walnuts or whatever additions: ie. dried Tomatoes, Olives etc.,  at this stage.
Incorporate into the dough.

Knead with bread hooks for a good 8 mins.  (unlike gluten regular bread, GF is sticky too knead)

The oven should be preheated to 250c.
Place bread on the middle shelf.
Continue baking at same temperature.   Check after 10 mins if the top has brown enough.
Cover with aluminium foil to protect and continue baking till done.  (Done = tap on bread all sides for hollow sound)

Optional: Place tray with water underneath ( they say for a crisper hard crust).

*Note use a big enough bowl to allow yeast to grow and not overspill.
Watch carefully for it to ferment.  It could foam very fast.
(Trick: Bain Maire it in boiling water from the kettle to accelerate the fermenting)
Once proof the yeast is working quickly

Tip:
To speed up the rising I rest the bread tin in a tray of boiling water.
This really hastens the rising time.

Noreen's 1st time


Dust with flour once bread is cooled
Best to cut when chilled as much as you can resist.

Bread No.1 ( Noreen's Recipe)
It rose really nicely


Baked too.
But as it cooled it flattened a bit.


Crumb is spongy and nice. A tad wet for me, hubby loved it.
Finally bread!!
The flax was pretty and gave a nice look and taste.


Recipe No. 2 (good)

Bread Flour Mix
Millet flour  – 2 cups
Sorghum flour –  1 cup
Cornstarch – 1 cup
Potato starch (not potato flour) – 1 cup
Tapioca starch (als0 called tapioca flour) –  1 cup
Total = 6 cup

1 cup plus 3 tablespoons skim or 1 or 2% milk (or milk substitute) (110º F)
1/4 cup Canola oil2 
large eggs (room temperature
2 2/3 cups Bread Flour Mix
1/2 cup Flax seeds
3 tablespoons sugar
2 1/4 teaspoons xanthan gum
1 1/2 teaspoons unflavored gelatin
3/4 teaspoon salt
Cube of FRESH yeast 25gr or 50gr?
3/4 cup chopped walnuts - (optional) I recommend love walnuts lots of Omega 3


Basically, add all dry ingredients
Warm milk with sugar in microwave
Add FRESH yeast and ferment.
Whisk eggs
Add wet ingredients to dry and mix, knead for full 10 mins.
Add walnuts at the end.


TIP: To speed up the rising I rest the bread tin in a tray of boiling water.
This really hastens the rising time.

The crumb is actually very nice and "bready"  Slightly moist on the bottom as in the pic.  but I didn't notice it when eating and certainly didn't affect the taste.


Made Noreen's (No.1)  2nd time around with walnuts


TIP: To speed up the rising I rest the bread tin in a tray of boiling water.
This really hastens the rising time.


Between recipe 1 and 2 little difference. Both very good bread
Left no.1 (Noreen's)     Right no. 2
The left is much browner because I'd added one cup of grounded flax seeds.

Bread no.3
This recipe used psyllium no xanthum gum

Failure:
The dough felt good and firm, much like a regular gluten bread which made me think maybe this is not correct?


Didn't rise at all.
But baked anyways, one last try before trashing it.


Ugh.  Happens.
This recipe used psyllium.


Noreen's (Recipe No.1)

My Gluten mix (Recipe No.2)

Discovery
The dough should be wetter and softer than regular dough bread.  So don't be afraid adding all that liquid.
You cannot knead GF bread in the traditional sense.  It's too sticky.  I use an electric hand mixer with bread hooks for about 8 mins.

Most times I put a tray of water on the bottom shelf of the oven, supposed to give a crunchier crust.

GF bread I'm told should only be cut into when cold. Never when still hot.

Didn't find much difference between 1 and 2.  They are both very tasty and bread-like


Update
Recipe No. 4

The weirdest recipe I admit but it worked!
Note the price just 6 nis! for gluten-free bread?
I was challenged as I was disgusted by the 28 nis price tag for sorghum.


Recipe on the back of the bag:

1kg GF Flour
50g Fresh Yeast
4 Eggs
60gr Butter (melted)
3 tbsp Date Syrup  (weirdish in a nice way..)
3 tbsps Tahina - (weird but OK)
600 ml lukewarm water
1/2 tsp salt
1 tbp of sugar (my addition to the yeast

Warm sugar, water, date syrup, butter, in the microwave.
Add fresh yeast.
Leave to ferment.
Add tahini

Flour mix:
Combine GF flour, salt.
Add proofed yeast mix. Knead with hooks for 8 mins.

In the last minute add walnuts or seeds etc.,

Place in lined tin and leave to prove.  This bread did not prove very high, but when it went in the oven it skyrocketed! Sorry for the blurry photo, clearly my hand was shaky from the monster coming  out of the oven.


Looks and feel like very "real normal" bread.
Couldn't wait to cut and taste it, but had to wait till cool'ish"  Gluten-free bread are notorious in collapsing when cut still hot.


Nice crumb, but tasted like supermarket bread.  That is no taste.
I wanted to stay true to the recipe the first time making it. Honestly, I didn't think this recipe and flour at 6 nis a pack would deliver!  But wow what a height it grew.

Flavour needs working on.  Next time will add flax seeds and walnuts etc to pack some bite.

Great tip: Always keep frozen GF breadcrumbs in the freezer.

Easy dessert just became a no-brainer.
Grab whatever fruit that's going soft in the fridge.
Cut, toss in cornflour.
Whip out frozen breadcrumbs, add cornflakes, desiccated coconut, walnuts, treacle, butter, (optional sugar)
Gluten-free topping done!

Recipe for GF fruit crumble - Click Here


Saturday, December 5, 2015

 
Pin It button on image hover